This section dives into the Coherence Spring Session module. It explains how to use Coherence’s support for Spring Session.
1. Getting Started
In this chapter you will learn how to configure Coherence as an HTTP session store using Spring Session.
First you need to add the coherence-spring-session dependency:
<dependencies>
    <dependency>
        <groupId>com.oracle.coherence.spring</groupId>
        <artifactId>coherence-spring-session</artifactId>
        <version>4.1.3</version>
    </dependency>
    <dependency>
        <groupId>com.oracle.coherence.ce</groupId>
        <artifactId>coherence</artifactId>
        <version>24.03</version>
    </dependency>
</dependencies>dependencies {
compile("com.oracle.coherence.spring:coherence-spring-session:4.1.3")
compile("com.oracle.coherence.ce:coherence:24.03")
}| Coherence Spring support for Spring Session can be used for either the free Coherence Community Edition (CE) or the commercial version. Coherence Spring does not bring in the Coherence dependency automatically but users must specify the Coherence dependency explicitly. |
In order to enable Spring Session support for Coherence, make sure Coherence is enabled and then enable Spring
Session using the @EnableCoherenceHttpSession annotation.
@Configuration
@EnableCoherence
@EnableCoherenceHttpSession(                     (1)
        session = "coherence_session",           (2)
        cache = "spring:session:sessions",       (3)
        flushMode = FlushMode.ON_SAVE,           (4)
        sessionTimeoutInSeconds = 1800,          (5)
        useEntryProcessor = true                 (6)
)
static class CoherenceSessionConfig {
}| 1 | Enables Spring Session support for Coherence |
| 2 | Specify the name of the Coherence Session. Optional. Defaults to Coherence' default session. |
| 3 | The name of the cache to use. Optional. Defaults to spring:session:sessions. |
| 4 | The FlushMode to use. Optional. Defaults to FlushMode.ON_SAVE. |
| 5 | The session timeout. Optional. Defaults to 1800 seconds (30 minutes) |
| 6 | When doing HTTP session updates, shall we use a Coherence entry processor? The default is {@code true}. |
Are you running Coherence as a dedicated server instance? Then you need to make sure that your Coherence
server may need one or more additional dependencies on its classpath for serialization. Depending on your requirements,
you may need Coherence Spring Session, Spring Security Core, Spring Security Web. Please also ensure that dependency
version between Coherence server and application clients matches exactly.
An alternative is to set useEntryProcessor to false. This is less efficient as the entire session has to be sent over
the wire when updating session properties. The positive side effect is that your Coherence server instance will not need
to be aware of the additional dependencies on its classpath.
2. POF Serialization
In case that you configured the cache using
POF serialization,
additional POF configuration for the class MapSession is necessary:
 <user-type>
     <type-id>2001</type-id>
     <class-name>org.springframework.session.MapSession</class-name>
     <serializer>
         <class-name>com.oracle.coherence.spring.session.serialization.pof.MapSessionPofSerializer</class-name>
     </serializer>
</user-type>| Depending on your serialization requirements and your session data, additional POF configuration may be necessary. |
3. Spring Session Samples
This Coherence Spring source code repository provides 2 dedicated example applications, illustrating the usage of Spring Session with a Coherence-backed session repository. The first example application uses Spring Boot as well as Spring Security. The second example application uses plain Spring Framework (without Spring Boot) and deploys as a WAR file to a Servlet container (e.g. Tomcat and Jetty).
3.1. Spring Session with Spring Boot
The example application show-cases 2 use-cases:
-
Use Spring Session with embedded Coherence instances and Java serialization
-
Use Spring Session with remote Coherence instances (Coherence*Extends) and Java serialization
Even though this demo is targeting Spring Session, we use Spring Security as well, since the authentication details are stored in the session as well. In regard to authentication, users have 2 choices:
-
A user can POST a JSON request containing the username and password in the body of the request.
-
Use basic authentication
The username is coherence, and the password rocks.
{ "username": "coherence", "password": "rocks" }Once successfully authenticated, the application will return a 2xx HTTP status with an empty body and a session cookie.
An Authentication failure, on the other hand, produces a non-2xx HTTP status with an empty body. The application has an
endpoint that responds to a GET request to the URL /hello that returns the string Hello Coherence. All endpoints
require an authenticated user using the session cookie or the username and password.
3.1.1. Start Spring Session with Embedded Coherence Instances
$ ./mvnw clean package -pl samples/spring-session-demo/spring-session-demo-appNow we are ready to run the application. Let’s launch 2 instances, one listening on the pre-configured port
8090, and the other one on port 8091.
 $ java -jar samples/spring-session-demo/spring-session-demo-app/target/spring-session-demo-app-4.1.3.jar
 $ java -jar samples/spring-session-demo/spring-session-demo-app/target/spring-session-demo-app-4.1.3.jar --server.port=8091
3.1.2. Spring Session with Remote Coherence Instances
In this variation of the example, we will start 1 central Coherence Server and the application will access that remote Coherence instance as a Coherence*Extend client.
$ ./mvnw clean package -pl samples/spring-session-demo/spring-session-demo-server $ ./mvnw clean package -pl samples/spring-session-demo/spring-session-demo-appNow we are ready to run the application. We will activate the coherence-client Spring Boot profile as well:
 $ java -jar samples/spring-session-demo/spring-session-demo-server/target/spring-session-demo-server-4.1.3.jar
 $ java -jar samples/spring-session-demo/spring-session-demo-app/target/spring-session-demo-app-4.1.3.jar --spring.profiles.active=coherence-client
By default, Coherence Spring Session uses a Coherence Entry Processor to perform updates to the persisted HTTP Session. This will prevent the entire session to be sent over the wire. A drawback of that approach is that the Coherence instance needs to be aware of Coherence Spring classes for serialization purposes.
Alternatively, you can also set the Coherence Spring Session property coherence.spring.session.use-entry-processor and
set it to false (It is true by default) in the client application spring-session-demo-app. With that in place, you
can now remove the relevant Maven dependencies:
-
spring-security-web
-
coherence-spring-session
from the server application module spring-session-demo-server and the application will still work.
3.1.3. Accessing the REST Endpoints
 $ curl -i -c cookie.txt \
 -H "Accept: application/json" \
 -H "Content-Type:application/json" \
 -X POST --data '{"username": "coherence", "password": "rocks"}' \
"http://localhost:8090/login" $ curl -i -b cookie.txt \
-H "Accept: application/json" \
-H "Content-Type:application/json" \
-X GET "http://localhost:8090/hello"3.1.4. Spring Session Actuator
Using Spring Boot’s Actuator endpoints, we can introspect the session using the
Sessions actuator at
localhost:8090/actuator/sessions?username=coherence.
coherence $ curl -i -b cookie.txt \
-H "Accept: application/json" \
-H "Content-Type:application/json" \
-X GET "http://localhost:8090/actuator/sessions?username=coherence"3.2. Spring Session with plain Spring Framework
While most new Spring applications are written using Spring Boot, there are certainly many applications that use the Spring Framework, only. Therefore, the following example uses plain Spring Framework without any Spring Boot and deploys as a WAR file to a Servlet container such as Tomcat or Jetty. The application will expose one endpoint that displays a simple counter that is incremented with each request and stored in the HTTP Session that is in return backed by Coherence.
Coherence Spring 4.1.3 is using the Jakarta EE namespace. For Java EE (javax.*), please use
Coherence Spring 3.3.x. Therefore, chose the appropriate version of the Servlet container accordingly.
|
This example uses a separate Coherence server instance to which the application will connect to using Coherence*Extend.
Furthermore, Coherence POF
is used for serialization. We will re-use the Coherence server from the spring-session-demo-server Maven module. This
will start 1 central Coherence server instance and the application will access that remote Coherence instance as a
Coherence*Extend client. In order to build the server application, execute the following in the root directory of the
Coherence Spring source code repository:
$ ./mvnw clean package -pl samples/spring-session-demo/spring-session-demo-serverNext, we will build the client application:
$ ./mvnw clean package -pl samples/spring-session-demo/spring-session-demo-warThe Coherence-specific configuration of the client is fairly straight-forward and mostly
contained in the Spring configuration class CoherenceSessionConfig:
 @Configuration
 @EnableCoherence                                                        (1)
 @EnableCoherenceHttpSession(                                            (2)
     cache = "spring:session:sessions",
     flushMode = FlushMode.ON_SAVE,
     sessionTimeoutInSeconds = 1800,
     useEntryProcessor = false
 )
 public class CoherenceSessionConfig
        extends AbstractHttpSessionApplicationInitializer {              (3)
     @Bean
     public SessionConfigurationBean sessionConfigurationBeanDefault() { (4)
         final SessionConfigurationBean sessionConfigurationBean =
             new SessionConfigurationBean();
         sessionConfigurationBean.setType(SessionType.CLIENT);           (5)
         sessionConfigurationBean.setConfig("remote-cache-config.xml");  (6)
         return sessionConfigurationBean;
     }
}| 1 | Enable Coherence Spring |
| 2 | Enable the Spring Session support for Coherence + you can specify several optional parameters |
| 3 | Extend AbstractHttpSessionApplicationInitializer to register the springSessionRepositoryFilter |
| 4 | Create a SessionConfigurationBean to configure the Coherence Session |
| 5 | Set the session type to CLIENT |
| 6 | Set the Coherence configuration file to remote-cache-config.xml |
The Coherence-specific remote-cache-config.xml configures the ExtendTcpCacheService and creates a cache mapping
for the cache spring:session:sessions to the remote-cache-scheme that uses the ExtendTcpCacheService.
Now we are ready to run the application. First, we will start the server. The server application uses Spring Boot and by activating a custom Spring Boot profile, Coherence will be started with POF serialization enabled:
 <cache-config xmlns:xsi="http://www.w3.org/2001/XMLSchema-instance"
               xmlns="http://xmlns.oracle.com/coherence/coherence-cache-config"
               xsi:schemaLocation="http://xmlns.oracle.com/coherence/coherence-cache-config coherence-cache-config.xsd">
   <defaults>
     <serializer>pof</serializer>
   </defaults>
... $ java -jar samples/spring-session-demo/spring-session-demo-server/target/spring-session-demo-server-4.1.3.jar --spring.profiles.active=pofFor the client application, deploy the generated WAR file spring-session-demo.war in
samples/spring-session-demo/spring-session-demo-war/target to a Servlet container, for example Tomcat 10.1.20.
$ cp samples/spring-session-demo/spring-session-demo-war/target/spring-session-demo.war /path/to/apache-tomcat-10.1.20/webappsThe application should start up and connect to the Coherence server instance. You can then access the application at
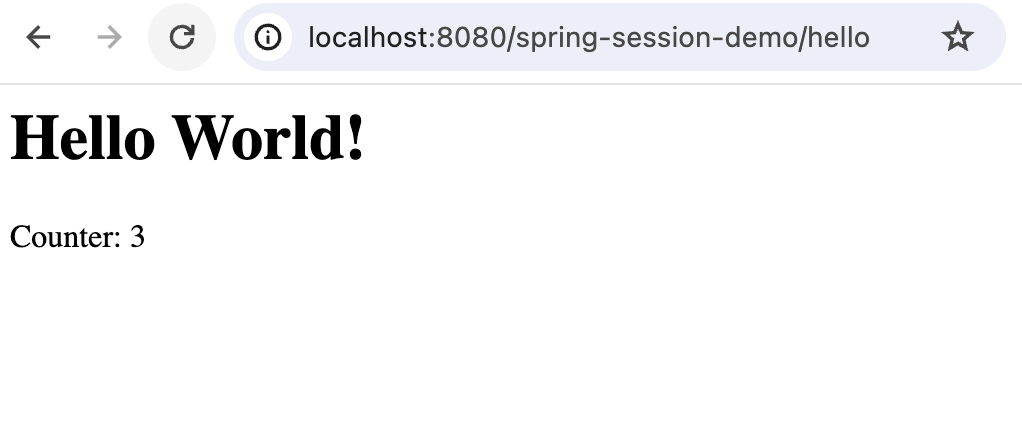
The invoked HelloController will display a simple counter that is incremented with each request and whose value is
stored in the HTTP Session.
4. Session Expiration Strategies
When dealing with the expiration of cache entries, you generally have 2 options in Coherence:
-
Set the expiration time for each put operation explicitly
-
Configure caches in your
coherence-cache-config.xmlfile
When you define a session timeout via the application, for example @EnableCoherenceHttpSession(sessionTimeoutInSeconds = 1000),
the session expiration will be set for each put-operation in CoherenceIndexedSessionRepository.
If not set in the application, Coherence Spring will expire HTTP session caches in 1800 seconds (30 minutes).
|
If you rather prefer defining the session expiration timeouts in your coherence-cache-config.xml file, you
should set the session timeout in the application to 0, for instance @EnableCoherenceHttpSession(sessionTimeoutInSeconds = 0).
That way, put operations will never to set an expiration value for the cache entry. You can then set the expiry-delay
cache configuration element for your cache in the coherence-cache-config.xml file.
In regard to the question, whether one strategy or the other strategy is preferable: It is mostly a
matter of preference. You do have, however, a bit more control when configuring expiration logic via the
coherence-cache-config.xml file, as you have the ability to define custom eviction policies.
For more information, please consult the respective chapter on Controlling the Growth of a Local Cache in the Coherence reference guide.
| The underlying expiry delay parameter in Coherence is defined as an integer and is expressed in milliseconds. Therefore, the maximum amount of time can never exceed Integer.MAX_VALUE (2147483647) milliseconds or approximately 24 days. |